
How To Fit To Page In Word – Complete Guide to Adjusting Your Document
Microsoft Word is one of the most widely used word processing tools worldwide. Whether you’re creating reports, flyers, or presentations, having your document perfectly fit on a page is essential for a professional look and flawless printing. Many users often struggle with how to fit to page in Word, especially when their content either extends beyond the page or leaves too much blank space. In this comprehensive guide, we will walk you through how to adjust your Word document effectively using various methods that ensure your content fits neatly to the page.
What Does “Fit To Page” Mean In Microsoft Word?
Fitting to page in Word means adjusting your document so that all text, images, tables, or other content fit within the printable area of a page without overflowing or unnecessary whitespace. This can refer to either the on-screen view or how the content prints. Achieving this helps prevent cut-offs, awkward page breaks, and enhances readability.
Why Is Fitting To Page Important?
- Professional Presentation: Documents that fit perfectly appear polished and tidy.
- Print Accuracy: Avoid content being cut off when printed.
- Save Paper: Reduces unnecessary pages and waste.
- Optimize Layout: Ensures the flow of information is smooth and easy to follow.
How To Fit To Page In Word: Step-by-Step Methods
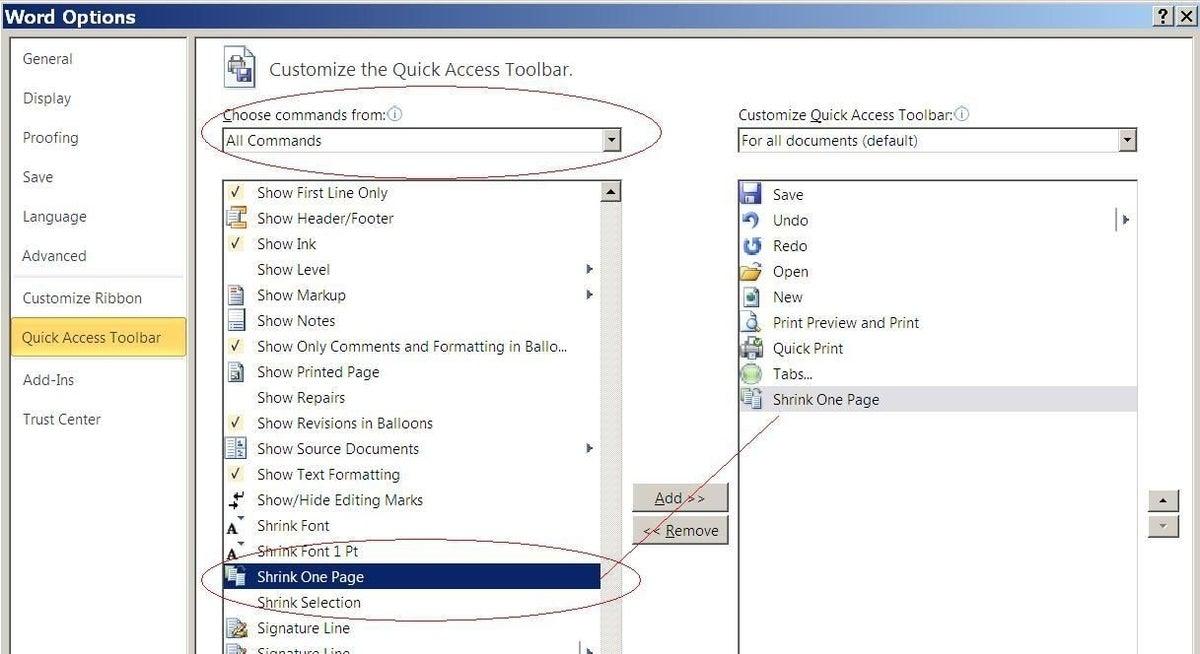
1. Use the “Shrink One Page” Command
The Shrink One Page feature in Word automatically reduces the font size and spacing slightly to fit your text onto one less page.
- Open your document in Microsoft Word.
- Go to the View tab and choose Print Layout.
- Click on the Layout tab.
- Select the Shrink One Page button within the Page Setup section.
Note: This command is typically available in older versions of Word via the Print Preview toolbar. In newer versions, you may need to manually reduce font or margins.
2. Adjust Margins To Fit Content
One of the simplest ways to fit your content to a page is by adjusting margins.
- Navigate to the Layout tab.
- Click on Margins.
- Choose one of the predefined margin sizes like Narrow, or click Custom Margins to set specific values.
Reducing margins provides additional space for your content and often resolves overflow issues.
3. Scale Content Using the Print Settings
If your content spills onto multiple pages but you want it to fit into one page on print, you can scale your document when printing.
- Press Ctrl + P to open the Print dialog.
- Under Settings, click More settings (depending on your printer driver).
- Look for an option like Scale to Fit or Fit to Page and enable it.
- Preview the document and print.
4. Resize Images, Tables, or Other Elements
Sometimes large images or tables cause content to spill onto additional pages. Resize these to fit better.
- Click on the image or table to select it.
- Drag the corner handles inward to shrink proportionally.
- Use the Layout Options to adjust text wrapping if needed.
5. Change Paper Size
Changing paper size can also help in fitting your content if you are restricted by format.
- Go to the Layout tab.
- Click Size and choose a larger paper size (e.g., switching from A5 to A4).
Helpful Tips to Ensure Your Document Fits Perfectly
- Use Styles consistently: Applying heading and paragraph styles maintains uniform spacing and font sizes.
- Avoid excessive line spacing: Keep line spacing between 1.15 to 1.5 for readability without too much space.
- Check page breaks: Remove manual page breaks that cause unnecessary blank pages.
- Use columns wisely: Columns can help balance text distribution.
- Preview before printing: Always check the Print Preview window to identify overflow issues.
Comparison Table – Methods To Fit To Page In Word
| Method | When to Use | Pros | Cons |
|---|---|---|---|
| Shrink One Page | Small overflow of text | Quick and automatic | May reduce font size too much |
| Adjust Margins | When text is close to edge | Simple, no content change | Margins may become too narrow |
| Scale in Print Settings | For perfect print fitting | Ensures all content shows | Spacing may look cramped on screen |
| Resize Images/Tables | Large objects cause overflow | Directly solves content size | May reduce visual impact |
| Change Paper Size | When format flexibility exists | More space for content | Not suitable for fixed-size documents |
Case Study: Fitting a Long Report into a Single Page
Anna, a marketing analyst, needed to print a one-page executive summary. Her initial document spanned two pages with default settings. She used the following approach:
- Reduced margins from 1 inch to 0.5 inches.
- Resized a large chart by reducing its dimensions by 40%.
- Applied consistent heading styles to reduce spacing.
- Enabled scale to fit in the print settings at 90%.
Result: Anna successfully fit her summary on one page without losing readability or important data – perfect for her presentation.
First-Hand Experience: My Tips For Fitting Content In Word
As a longtime Microsoft Word user, I’ve found that the key to fitting content to the page lies in planning your layout early. Before adding massive images or complex tables, think about space. I also recommend frequently toggling to Print Preview to catch issues early on. Using paragraph spacing adjustments and styles consistently helps maintain a clean document structure, which automatically aids page fitting.
Conclusion
Knowing how to fit to page in Word can save you time, paper, and frustration. Whether you’re preparing a printout or creating a digital document, these techniques allow you to control your content’s layout professionally. From adjusting margins and scaling content to utilizing print options and resizing elements, multiple pathways exist to tailor your document perfectly to a page. Try these methods and discover what works best for your specific needs!
For more Word tips and tricks, stay tuned to our blog and optimize your document skills today!


